Create your first plugin
Introduction
This tutorial is designed to help you get started with plugin development in LeviLamina. It is by no means a complete tutorial of all the possibilities in LeviLamina, but rather an overview of the basics. First, make sure you understand C++, set up your workspace in the IDE, and then introduce the basics of most LeviLamina plugins.
In this tutorial, we will create a simple plugin that implements the following features:
- Players can enter the
/suicidecommand to suicide - Players are given a clock when they first log in to the server
- When players use the clock, a confirmation window pops up asking if they want to suicide, and if they confirm, they suicide
This tutorial covers the following topics:
- Logging output
- Subscribing and unsubscribing events
- Registering commands
- Reading configuration files
- Database access
- Using forms
- Constructing Minecraft objects
- Calling Minecraft functions
Info
All the source code for this tutorial can be found at futrime/better-suicide. We recommend that you look at the source code while reading the tutorial. If you have installed lip, you can also run the following code to install the plugin implemented in this tutorial in the LeviLamina instance environment.
| Bash | |
|---|---|
1 | |
Learn C++
These tutorials require basic knowledge of the C++ programming language. If you are just starting out with C++ or need a refresher, here is a non-exhaustive list.
- C++ Developer Roadmap
- cppreference.com
- C++ Tutorial
- C++ Language Tutorial
- hacking C++
- C++ Core Guidelines
Set up your workspace
Before developing plugins (or learning C++), you need to set up a development environment. This includes but is not limited to the following:
- xmake
- Visual Studio Code
- Git
- Visual Studio 2022 (When installing Visual Studio 2022, make sure to check the C++ desktop application development option)
Warning
If you are not using the latest version of Visual Studio 2022, MSVC, and Windows SDK, you may encounter problems in building, loading, and running plugins later. If you encounter problems like xxx is not a member of std, please consider this possibility. The environment for testing the build of this tutorial is Visual Studio Community 2022 17.8.1, MSVC v143 - VS 2022 C++ x64/x86 build tools (v14.38-17.8), Windows 11 SDK (10.0.22000.0)
Tip
Because the LeviLamina project is huge, if you use Visual Studio Code, its built-in Intellisense system may be overwhelmed. We recommend that you install the clangd plugin and use clangd for code checking and so on. After installing clangd and the corresponding plugin, you need to run the following command to generate compile_commands.json, and then restart VSCode to make clangd effective.
| Bash | |
|---|---|
1 | |
Then, you need to install LeviLamina somewhere. This tutorial is for LeviLamina 0.9.2, and some modifications may be required for other versions.
Create a plugin repository
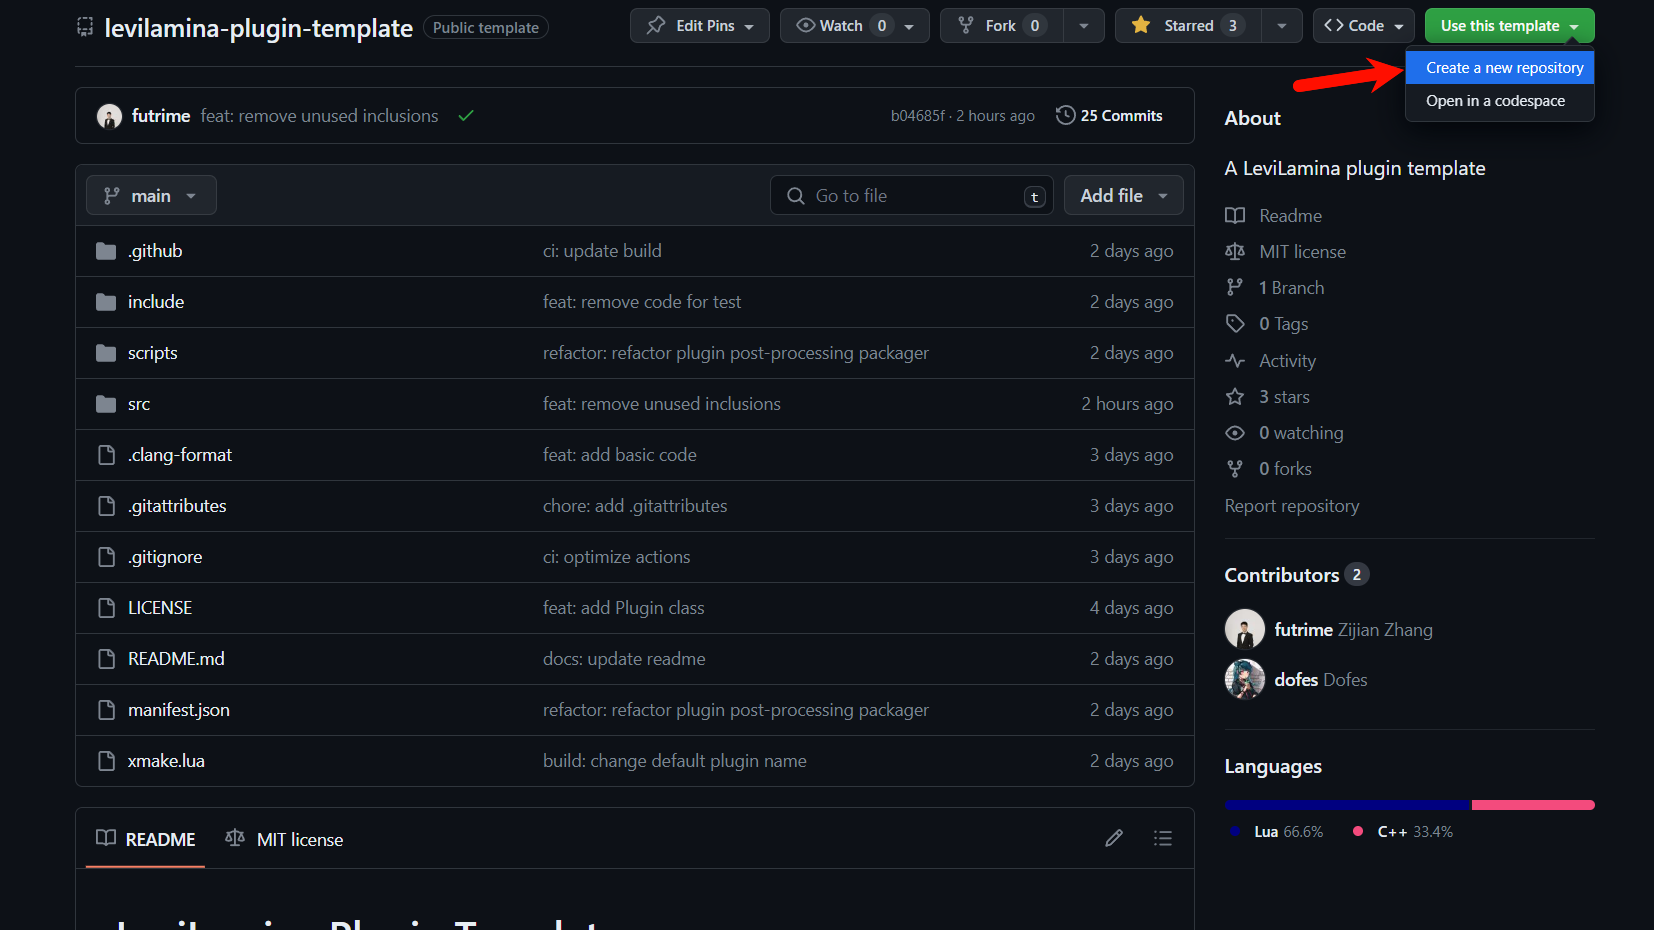
Visit levilamina-plugin-template and click Use this template to use this template to initialize your plugin repository.
Clone the plugin repository to your local machine using Git, and then open it with VSCode. You need to modify some of the files to fill in your plugin information.
First, you need to modify the plugin name information in xmake.lua. Modify the plugin name to specify the name of your plugin, which will be displayed in LeviLamina. The name allows uppercase and lowercase English letters, numbers, and hyphens, and does not allow spaces and other special characters. It is recommended to use example-plugin or ExamplePlugin these two forms. Here, our plugin is named better-suicide.
| Lua | |
|---|---|
1 | |
Next, modify the contents of tooth.json. tooth.json provides relevant information for lip to install plugin packages. After proper configuration, your plugin will be included in the lip Index and can be downloaded and installed by users around the world. Change the value of the tooth field to the GitHub repository address of this plugin, fill in the information fields in info, and then fill in the asset_url field according to the release address of the repository, modify the dependent LeviLamina version, and modify the place of src and dest according to the plugin name filled in xmake.lua. For the plugin in this article, the following is a feasible reference:
| JSON | |
|---|---|
1 2 3 4 5 6 7 8 9 10 11 12 13 14 15 16 17 18 19 20 21 22 23 24 25 26 | |
Then, you need to modify the copyright information in the LICENSE file. You can choose an open source license that suits your plugin here. Rest assured, your plugin does not need to be open source, because the plugin template uses the CC0 license, you can freely modify or delete the LICENSE file. However, we recommend that you use an open source license, because this way you can make it easier for others to use your plugin and help you improve your plugin.
Next, you need to modify the contents of the README.md file. This file will be displayed on the main page of your plugin repository, where you can introduce the features, usage, configuration files, commands, etc. of your plugin.
Finally, you need to change the namespace name. Change the namespace my_plugin in MyPlugin.cpp and MyPlugin.h to the name you want. Following common C++ conventions, namespace names should use lowercase letters and underscores, and should be consistent. Here, we uniformly change it to better_suicide. Similarly, you can change MyPlugin.cpp and MyPlugin.h to the names you want, but at the same time remember to change #include MyPlugin.h in the source file to the new header file name.
Build your plugin
Before we start, let's try to build an empty plugin.
First, update the repository:
| Bash | |
|---|---|
1 | |
Configure the build:
| Bash | |
|---|---|
1 | |
Tip
If you want to build in other modes, you can also use -m release or -m releasedbg. These two modes will enable the fastest optimization level. Among them, -m release will turn off debugging information, while -m releasedbg will turn on debugging information, just like -m debug. For their specific differences, please refer to Custom Rules - xmake.
Failure
If you encounter a download failure during the repository update or build configuration process, you may need to configure GitHub mirror proxy:
| Bash | |
|---|---|
1 | |
Then build:
| Bash | |
|---|---|
1 | |
Failure
Build failed? Try upgrading Visual Studio 2022, MSVC, and Windows SDK. Remember, be sure to upgrade to the latest version.
Add #include
Add #include in MyPlugin.cpp, the final effect looks like this:
| C++ | |
|---|---|
1 2 3 4 5 6 7 8 9 10 11 12 13 14 15 16 17 18 19 20 21 22 23 24 25 26 27 28 | |
Register command /suicide
In BDS, commands are not registered from the beginning, but need to be registered after a specific program is executed. Therefore, you cannot register plugins when they are loaded, but only when they are enabled. Generally speaking, you should also unregister commands when the plugin is disabled to prevent undefined behavior.
Warning
The plugin will call its constructor when it is loaded. But please do not put event subscription, command registration, and any other game-related operations in the constructor, because these operations need to be performed after the game is loaded. If you do these operations in the constructor, your plugin will most likely crash when loading.
Tip
Generally speaking, the plugin's constructor only needs to perform some game-independent initialization operations, such as initializing the logging system, initializing the configuration file, initializing the database, etc.
| C++ | |
|---|---|
1 2 3 4 5 6 7 8 9 10 11 12 13 14 15 16 17 18 19 20 21 22 23 24 25 26 27 28 29 | |
Let's break down these codes and see. The following statement gets the command registry. The command registry only takes effect after a specific time, so its type is optional_ref<T>. We need to determine whether the command registry obtained is valid.
| C++ | |
|---|---|
1 2 3 4 | |
LeviLamina's command system supports using the CommandRegistrar::getOrCreateCommand() function to directly register or get commands.
| C++ | |
|---|---|
1 2 | |
The first parameter is the command itself, which is the character entered in the console or chat bar. Although it has not been tested whether various special characters can work, we still recommend that only lowercase English letters be included. The second parameter is the command introduction. When entering part of the command in the chat bar, the candidate command and its introduction will be displayed in a semi-transparent gray form above. The third parameter is the command's permission level, which is defined as follows. Among them, if we want ordinary players in survival mode to be able to execute, we should choose Any. And GameDirectors corresponds to the permission of players who are at least in creative mode, Admin corresponds to the permission of at least OP, and Host corresponds to the console's permission.
| C++ | |
|---|---|
1 2 3 4 5 6 7 8 | |
Then, we need to add an overload to the command and set the corresponding callback.
| C++ | |
|---|---|
1 2 3 | |
Note
The command overload means a mode of the command, such as ll <load|unload|reload> <plugin:string> is an overload, and ll list is another overload. Here is an example, from LeviLamina's plugin management command:
| C++ | |
|---|---|
1 2 3 4 5 6 7 8 9 10 11 12 13 14 15 16 17 18 19 20 21 22 | |
In the callback function, we first try to get the source of the command execution. Here, we need to make a judgment, because the console, command block and even various entities can execute commands, but the suicide plugin should only respond to the player's request. If the wrong source of execution executes the suicide command, an error message should be prompted.
| C++ | |
|---|---|
1 2 3 4 5 | |
After we confirm that the source of execution is the player, we can convert the entity pointer to the player pointer and kill it.
| C++ | |
|---|---|
1 2 3 4 | |
Warning
Because BDS lacks RTTI information, dynamic_cast<T>() cannot be used.
Tip
You may have noticed another function player->getName(), but we did not use it. This is because the player's name can be modified by plugins or other means, while the result of player->getRealName() is (generally speaking) fixed.
At this point, the command object has been configured, and the command object will be loaded into the game after the server starts.
At the end of the enable() function, return a true to indicate that the plugin is successfully enabled. If false is returned in the enable() function, LeviLamina will think that the plugin is enabled to fail and prompt an error message on the console.
Read the configuration file
The second feature of our plugin is to give a clock when the player first enters the server; the third feature is to pop up a confirmation of suicide when using the clock, and the player can suicide after confirmation. But there is a small problem with these two features: the server administrator may have installed other plugins that implement similar functions, and do not want to use these functions in this suicide plugin. We hope to provide some way to allow administrators to turn these two functions on and off.
We are very pleased to announce that LeviLamina has implemented the reflection of configuration files and configuration information structures in C++. This means that we can define a structure in C++, and then define an instance of this structure in the configuration file, and LeviLamina will automatically read the contents of the configuration file into the structure instance. In this way, we can directly use this structure instance in C++, without having to parse the configuration file ourselves.
First, we create another Config.h file, define a structure Config, and use it to store configuration information.
| C++ | |
|---|---|
1 2 3 4 5 | |
We add a member variable in the anonymous namespace to store the configuration information in the configuration file.
| C++ | |
|---|---|
1 2 3 4 5 6 7 | |
Then, we read the configuration file and save the configuration information to the member variable.
| C++ | |
|---|---|
1 2 3 4 5 6 7 8 9 10 11 12 13 14 15 16 17 18 | |
In this code, we first get the plugin's configuration file path, and then call the ll::config::loadConfig() function to read the configuration information in the configuration file into the structure instance. If the read fails, we will output a warning message on the console and save the default configuration information to the configuration file.
Note
Since the configuration file is read in the constructor, it can be guaranteed that the configuration file has been read successfully in subsequent operations.
Persistently save player entry information in the database
The second feature of our plugin is to give a clock when the player first enters the server. However, if we save the entry information in memory, the player's entry information will be lost when the server restarts. Therefore, we need to persistently save the player's entry information in the database. LeviLamina provides a KV database wrapper that allows us to use the database directly in C++.
First, we add a member variable in the anonymous namespace to store the database instance.
| C++ | |
|---|---|
1 | |
Note
Why is it std::unique_ptr<ll::KeyValueDB> instead of ll::KeyValueDB? This is because ll::KeyValueDB prohibits copying and can only be moved. Therefore, we need to use std::unique_ptr to store the ll::KeyValueDB instance.
Warning
Please do not use ordinary pointers to store the ll::KeyValueDB instance, because this can easily make the life cycle management complicated, resulting in memory leaks and other problems. Remember: you are writing C++, not C.
Then, in the load function, we initialize the database instance.
| C++ | |
|---|---|
1 2 3 4 5 6 7 8 9 10 | |
In this code, we first get the plugin's database path, and then call the std::make_unique<ll::data::KeyValueDB>() function to create a database instance. If the database path does not exist, the std::make_unique<ll::data::KeyValueDB>() function will automatically create the database path.
Note
Since the database initialization is done in the constructor, it can be guaranteed that the database has been initialized successfully in subsequent operations.
Give a clock when the player first enters the server
The second feature of our plugin is to give a clock when the player first enters the server. We need to judge whether the player is entering the server for the first time when the player enters the server, and if so, give a clock.
In BDS, when the player enters the server, the event PlayerJoinEvent is triggered. In LeviLamina, we can subscribe to this event, and when this event is triggered, the plugin can implement the logic when the player enters the server.
In the anonymous namespace, we add an event listener pointer:
| C++ | |
|---|---|
1 | |
In the enable() function, we register this event listener, and in the disable() function, we unregister it.
| C++ | |
|---|---|
1 2 3 4 5 6 7 8 9 10 11 12 13 14 15 16 17 18 19 20 21 22 23 24 25 26 27 28 29 30 31 32 33 34 35 36 37 38 39 40 41 42 43 44 45 46 47 48 49 50 | |
Let's break down these codes and see. In the callback lambda function, we capture the doGiveClockOnFirstJoin in the configuration, as well as the plugin's logger and database instance. Then, we judge whether the doGiveClockOnFirstJoin in the configuration is true, and if so, continue to execute the logic.
| C++ | |
|---|---|
1 2 3 4 5 6 7 | |
Next, we get the player instance and the player's UUID from the event instance.
| C++ | |
|---|---|
1 2 | |
Note
The type of UUID obtained here is mce::UUID instead of std::string. We recommend that you only convert UUID to std::string when needed, because mce::UUID is more efficient.
Danger
Please do not use XUID as the player's unique identifier. Although in the LiteLoaderBDS era, many plugins used XUID as the player's unique identifier, this is incorrect. XUID is the identifier of Xbox Live, not the player. If the server does not enable online mode, or there are fake players, the behavior of XUID will be unpredictable. Therefore, we strongly recommend using UUID as the player's unique identifier.
Then, we use the player's UUID as the key to get whether the player has entered the server before from the database. If the player has entered the server before, then we don't need to give the player a clock again.
| C++ | |
|---|---|
1 2 3 4 | |
Next, we create a clock item stack and add it to the player's backpack.
| C++ | |
|---|---|
1 2 | |
Note
Here we use the ItemStack class instead of the Item class. The ItemStack class is a wrapper of the Item class, which contains the quantity, enchantment, durability and other information of the item, while the Item class only represents the item category. Therefore, the ItemStack class should be used instead of the Item class.
Then, we need to refresh the player's inventory so that the player can see the clock.
| C++ | |
|---|---|
1 | |
Finally, we use the player's UUID as the key to mark the player as having entered the server.
| C++ | |
|---|---|
1 2 3 4 | |
In the disable() function, we need to remove the event listener from the event bus to unsubscribe from the event.
| C++ | |
|---|---|
1 | |
Pop up a confirmation of suicide when using the clock
The third feature of our plugin is to pop up a confirmation of suicide when using the clock, and the player can suicide after confirmation. We need to subscribe to the player's use of items event, and when the player uses the clock, pop up a confirmation of suicide.
In the anonymous namespace, we add an event listener pointer:
| C++ | |
|---|---|
1 | |
In the enable() function, we register this event listener, and in the disable() function, we unregister it.
| C++ | |
|---|---|
1 2 3 4 5 6 7 8 9 10 11 12 13 14 15 16 17 18 19 20 21 22 23 24 25 26 27 28 29 30 31 32 33 34 35 36 37 38 39 40 41 42 43 44 | |
Let's break down the code and see. In the callback lambda function, we capture the configuration item enableClockMenu and logger, and then judge, only when the configuration item is enabled, execute the logic.
| C++ | |
|---|---|
1 2 3 4 5 6 7 | |
In the logic, we first get the two attributes of the event, the player who uses the item and the item being used. Then judge whether the item id is clock, and execute the pop-up form logic.
| C++ | |
|---|---|
1 2 3 4 5 6 | |
Warning
Do not use itemStack.getName(), because this function returns the name of the item displayed, such as Clock or Iron Sword.
Here we use the simplest modal form ModalForm, the first parameter of the constructor is the title of the form, the second parameter is the prompt content of the form, the third parameter is the content of the lower left button, and the fourth parameter is the content of the lower right button. The callback function receives two parameters, the first parameter is the player to whom the form is sent, and the second parameter is the player's choice, true means that the lower left button is selected.
| C++ | |
|---|---|
1 2 3 4 5 6 7 8 9 10 11 12 13 | |
Next, send the form to the player.
| C++ | |
|---|---|
1 | |
Run your plugin
If your plugin is built normally, you should be able to see a directory named after your plugin in the bin/ directory. Copy this directory to the plugins/ directory in the LeviLamina directory (create it if it does not exist), and get the following file structure:
| Text Only | |
|---|---|
1 2 3 | |
Then run the LeviLamina server (bedrock_server_mod.exe) and you're done.
Next steps?
You can publicly release your plugin and let more people use your plugin.
Further exercises
We can add some features to this plugin based on this plugin to practice more knowledge of LeviLamina plugin development. Here are some possible exercises:
- Set the cooldown time for player suicide
- Keep all items from dropping when the player suicide
- Keep the experience when the player suicide
- Suicide at the original place when the player suicide
- Count the number of player suicides and display the leaderboard on the sidebar
- Use more advanced forms to let the player choose the way of suicide
- Show a custom death message when the player suicide
Here are some references you may need: